How to plan a bathroom tile layout, step by step
A good layout shows at once: grout lines meet at the corners, there is no 2 cm strip at the door, the niche and the mixer sit exactly on the joints. All of this is decided before the tiles are bought, on paper or in software. Here is the order experienced tilers and designers follow.
1. An accurate survey
A layout is never more accurate than the measurements. For a bathroom you need:
- the length of every wall at floor level and under the ceiling: walls are rarely parallel;
- both floor diagonals, to see whether the corners are square;
- the height at several points if the floor or ceiling is uneven;
- doors and windows with reveals, pipe boxes, the WC frame, the bath or shower tray;
- water and waste outlets if they are already in place.
If the measurements do not add up, measure again now rather than find out on site.
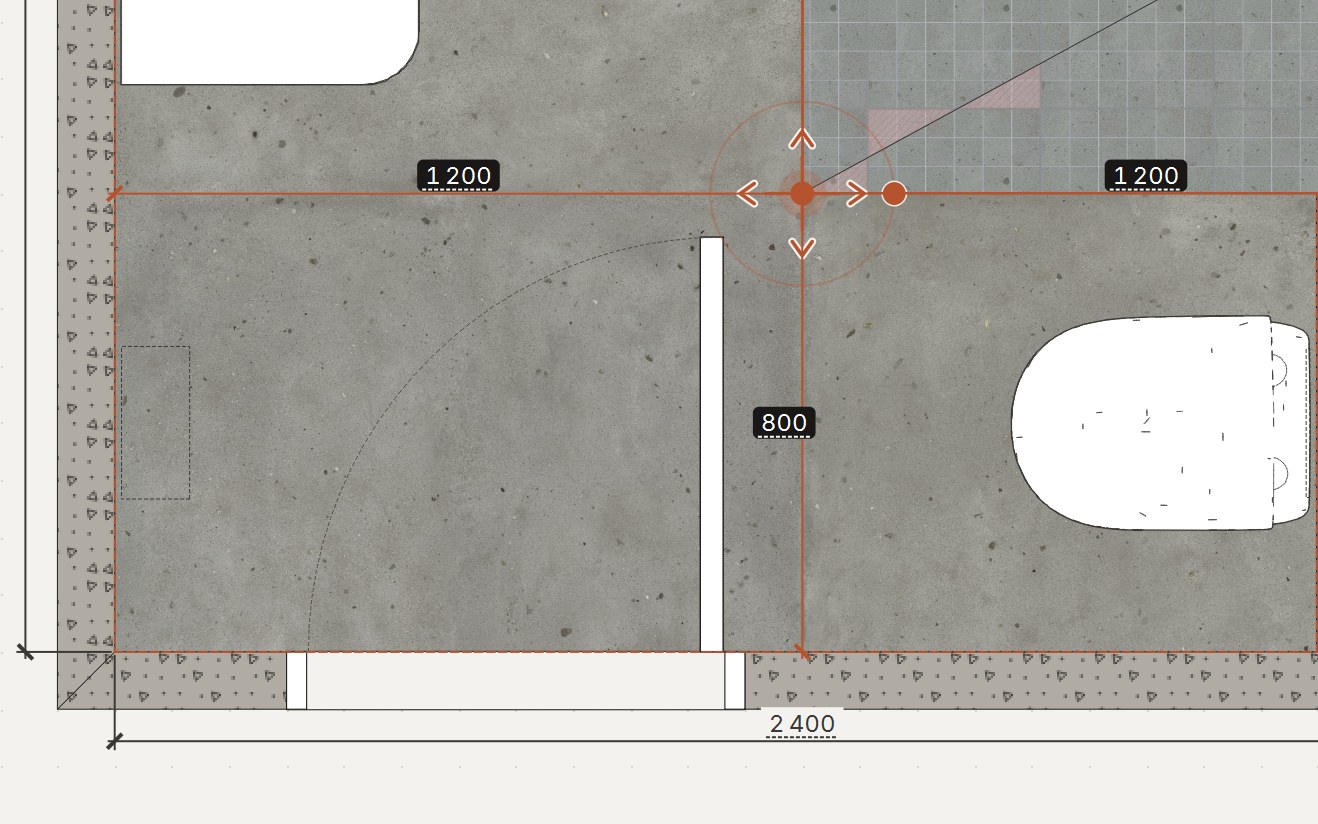
2. Tile, joint and pattern
The tile size drives almost everything else. A large 1200×600 format gives few joints but needs a flat substrate and more adhesive. A small format forgives unevenness, but there are many joints and more grout.
Take the joint width from the manufacturer: usually 1.5–2 mm for rectified tiles and 2–3 mm for non-rectified. The laying pattern (straight, offset, herringbone and others) affects the overage and the number of cuts; see the article on tile laying patterns.
3. Where the layout starts
This is the key step. Where the first tile goes decides which cuts you get at the walls, the door and the corners. The usual rules:
- on the floor, cuts at opposite walls are equal, and the most visible places (the entrance, the bath axis) get a full tile or an even half;
- on a wall, the bottom row is full if the floor is level, or the cut goes where the bath or furniture will hide it;
- a cut narrower than a third of the tile counts as a sliver: it is hard to cut and looks like a mistake.
How to find a starting point without slivers is covered in how to avoid thin tile slivers.
4. Niches, mixers and openings on the joints
A niche whose edges fall in the middle of a tile looks accidental. Niche edges, the mixer axis, the flush plate and door reveals are worth fitting to the joint grid: often moving a niche by 15–20 mm is enough. Decide this before the boxing is built.
Window and niche reveals are tiled so that the joint from the face of the wall continues onto the reveal without a break.
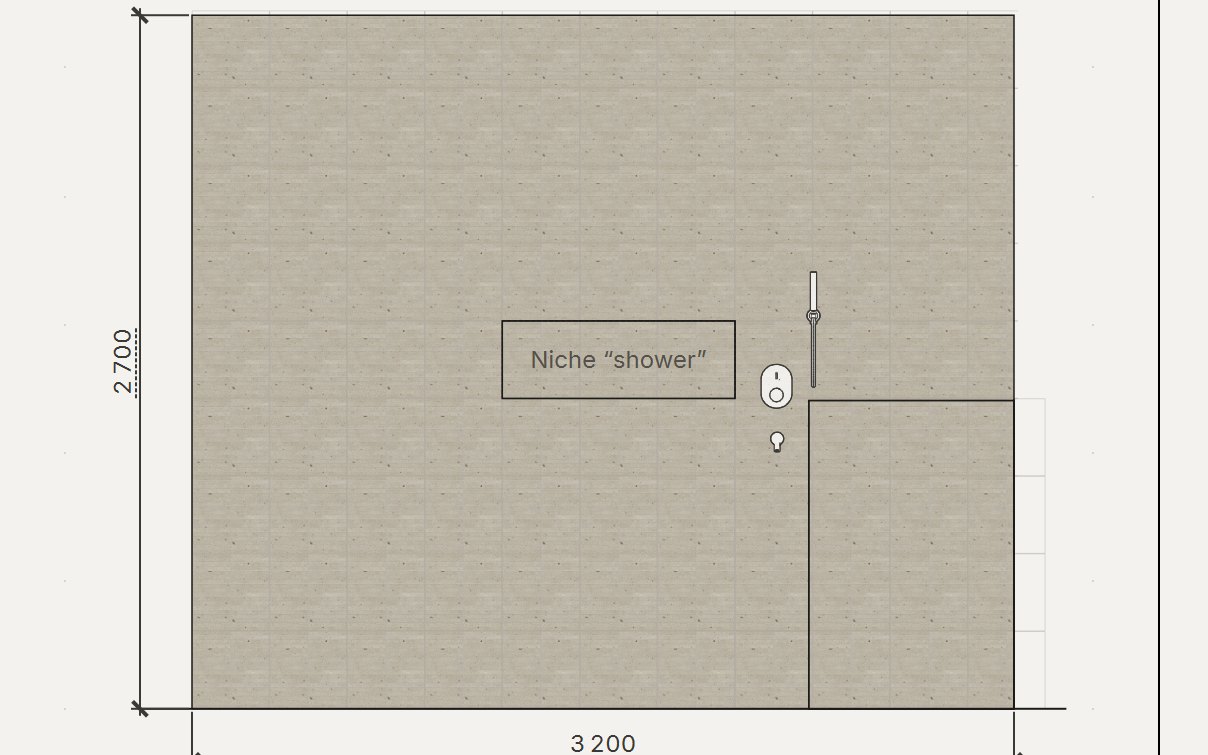
5. Elevations and the drawing for the tiler
Each wall is drawn separately, seen from inside the room, left to right. The elevation shows every cut with its size, the starting point and the joint width. The tiler works from that sheet without phone calls or guesswork.
6. The estimate
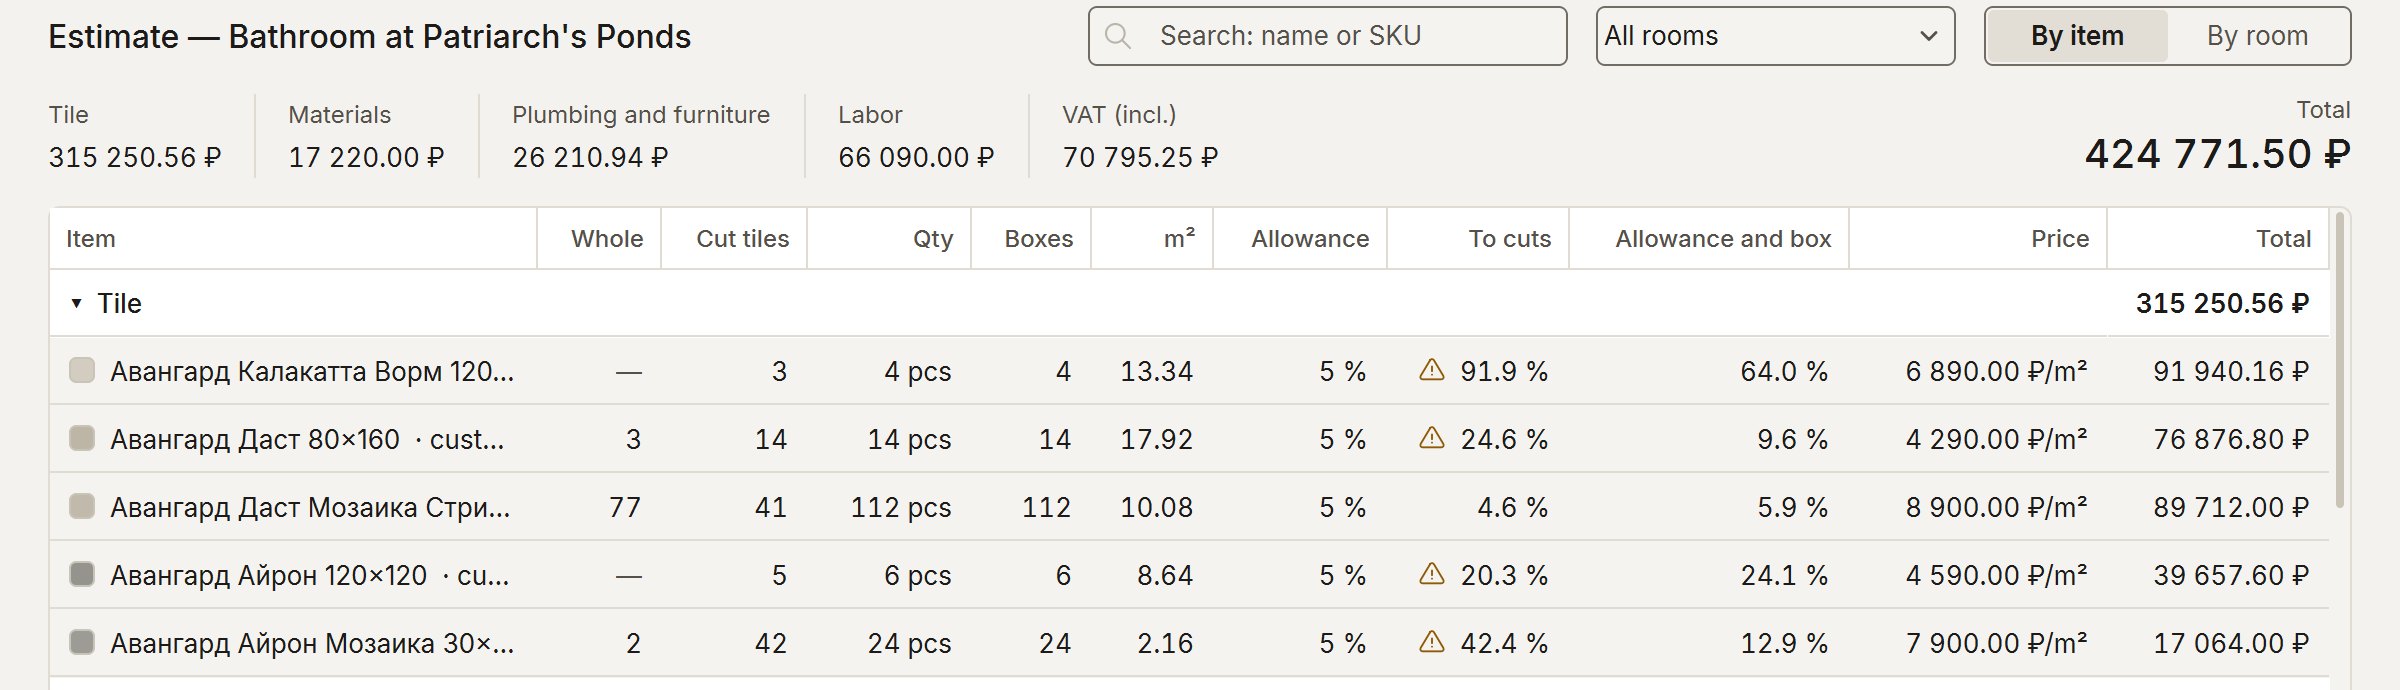
Once the layout is done, counting is simple: full tiles and cuts on every surface, the overage for the pattern, then rounding up to boxes. Add adhesive by tile size, grout by joint width, primer and waterproofing for the wet zone. The formulas are in how much extra tile to buy and adhesive and grout coverage.
Work it out for your own room
ATELIER 3D lays out tiles from your measurements, counts tiles in boxes and adhesive and grout in bags, and shows the bathroom in 3D. 7-day trial, no card.
Download free